We have a living room area in our house where we watch TV, play video games, and generally hang out. Considering the amount of time that we spend there, the lighting is very poor. We used floor lamps for a year or so before we decided it made more sense to install sconces. We were really picky about the sconces, and we developed the following criteria:
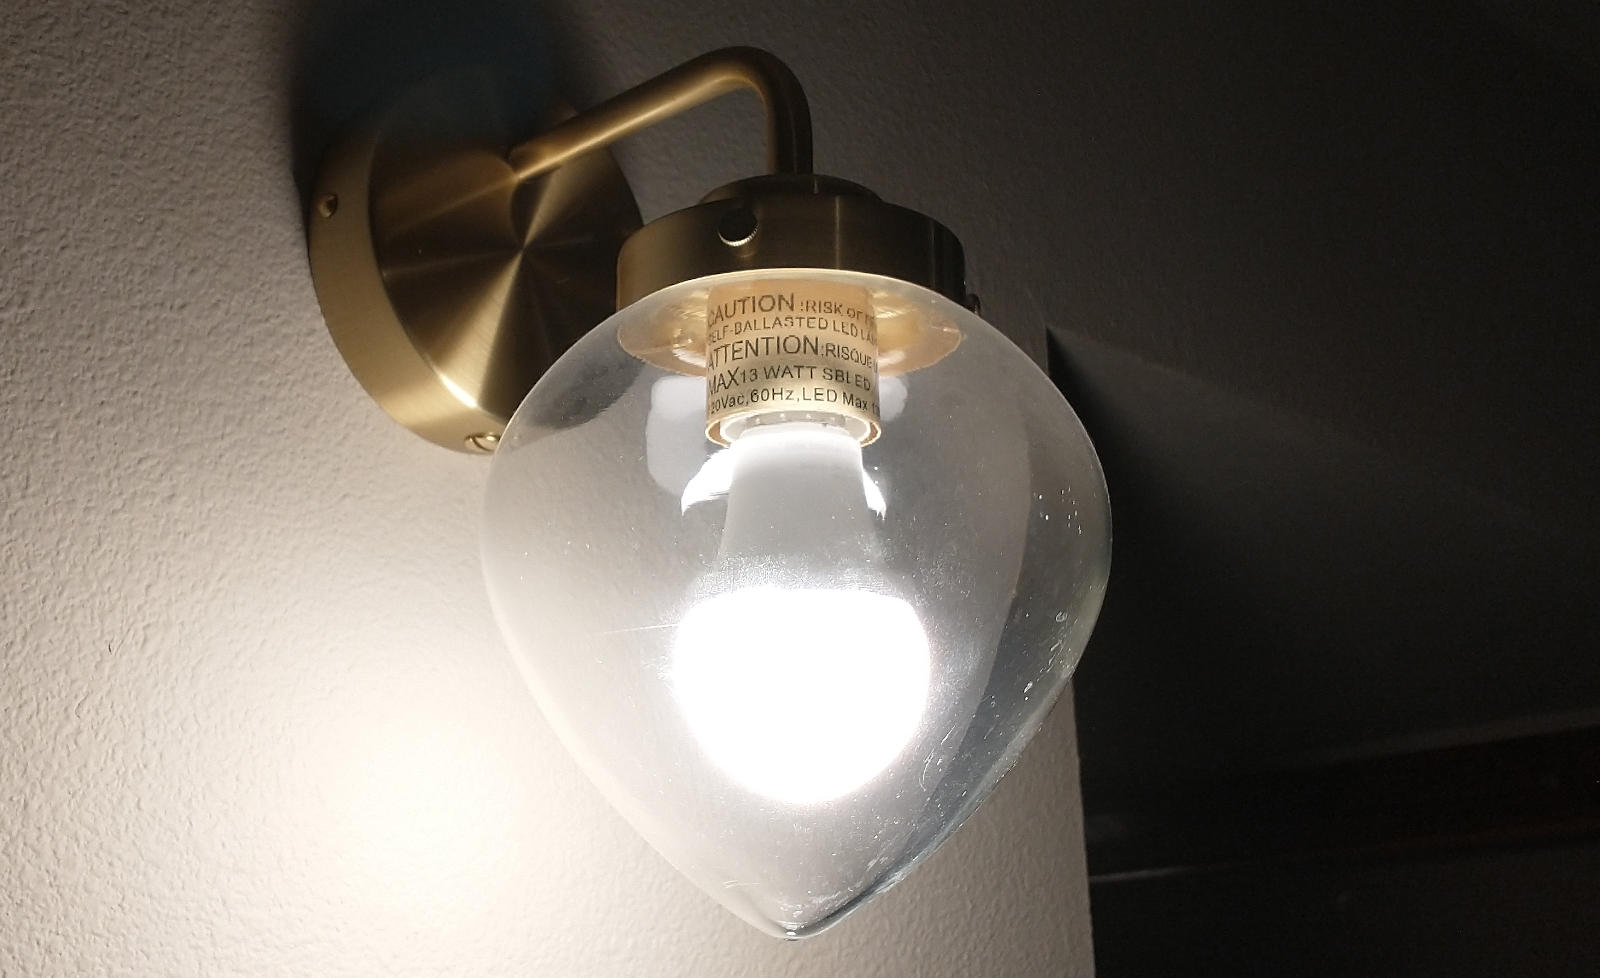
- Should be in-keeping with the gold-stem-with-clear-glass aesthetic of the rest of our lights in the area
- Some of the light should scatter off the ceiling, so the lights must not be shaded
- LED bulbs will be used, so the sconce must be stylish enough on its own to use regular-looking ugly bulbs
- Had to stand away from the wall far enough to shine around some curtains.
- The style must not be industrial-chic
- No exposed cables
As it turned out, it was nearly impossible to find sconces that fit the bill. Most of the ones that we really liked were really expensive, except for our favorite, which was the Återsken wall lamp from Ikea. We ordered them immediately because they were about $20 each, which was a good idea because it looks like Ikea has stopped selling them where we live.
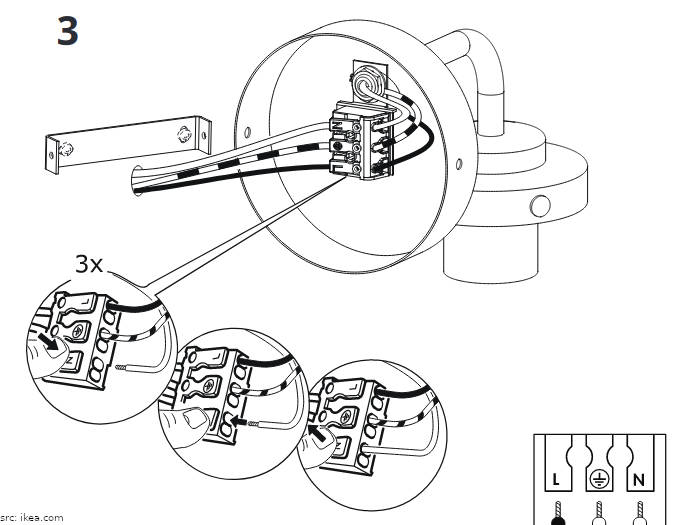
Of course, they were intended for people to hang on a wall using a bracket and then plug in to an outlet, so they failed the exposed cables requirement. Ikea now sells “wired in” versions of these lamps in the UK, but I still cannot find them in the US. Fortunately, turning the plug-in sconce into a wired-in sconce is pretty simple.
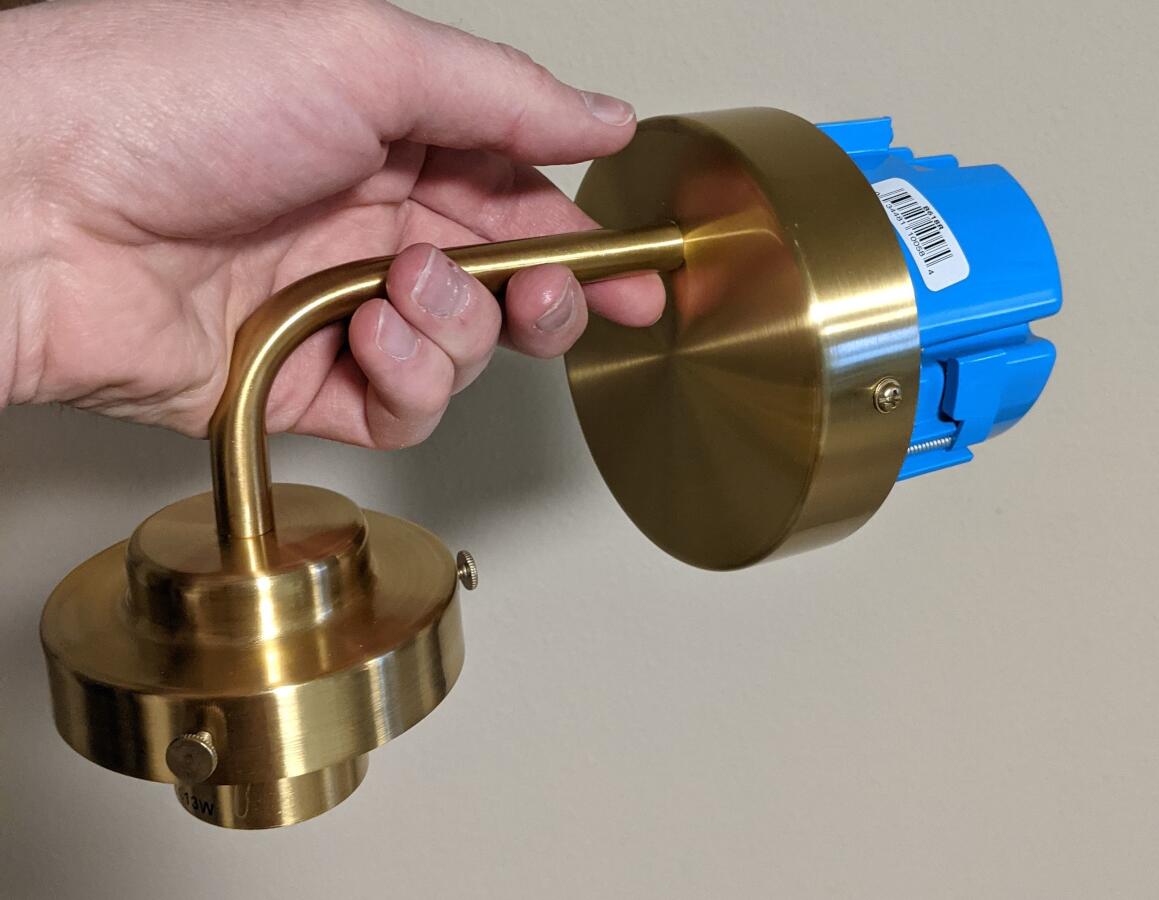
I went ahead with purchasing some circular electrical boxes for remodeling. Circular boxes are used for ceiling lights and sconces, and are sometimes called sconce boxes. These kinds of boxes have little wings that spin out from the sides as the screws are tightened down, and they kind of clamp against drywall, making them very popular for small remodeling projects because the wall can stay closed while the box is installed. The Ikea lamp base is just barely bigger than the outer edge of the standard full-depth blue boxes I found at the hardware store, which is perfect.
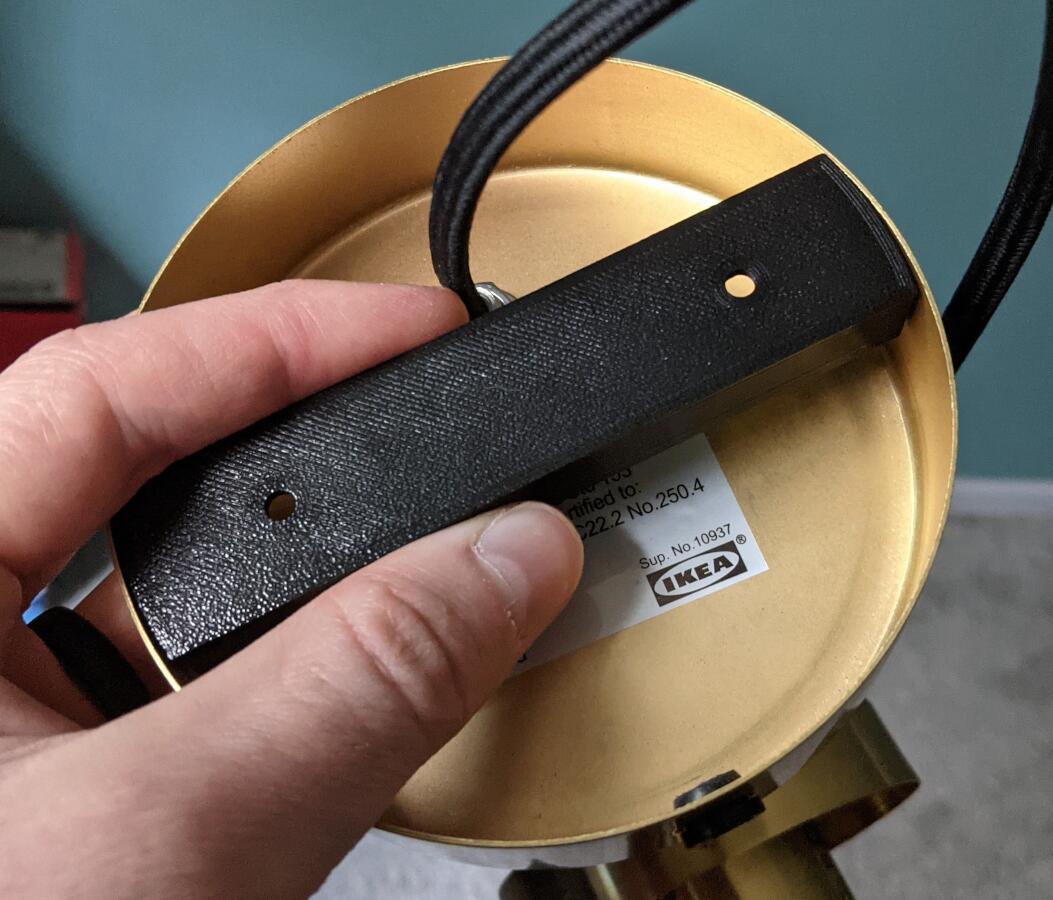
The first issue I ran into is that the metal bracket that came with the lamps (as shown on the left in the figure above) was slightly small for the lamp. This way, when the lamp is screwed to it, the sides deform a little bit, which I did not want. Also, the existing holes in the bracket did not line up with the standard spacing of mounting holes on US electrical boxes.
Unfortunately, one of the walls where we wanted a sconce is an exterior wall. Installing a full-depth electrical box would have displaced the insulation and made a heat bridge to the outside. This could have a bunch of negative side effects. For example: the inside of the lamp base would get cold during in the winter, and water vapor would condense on it inside the wall, which would be gross. To fix this problem, I bought a shallow circular electrical box on Amazon.
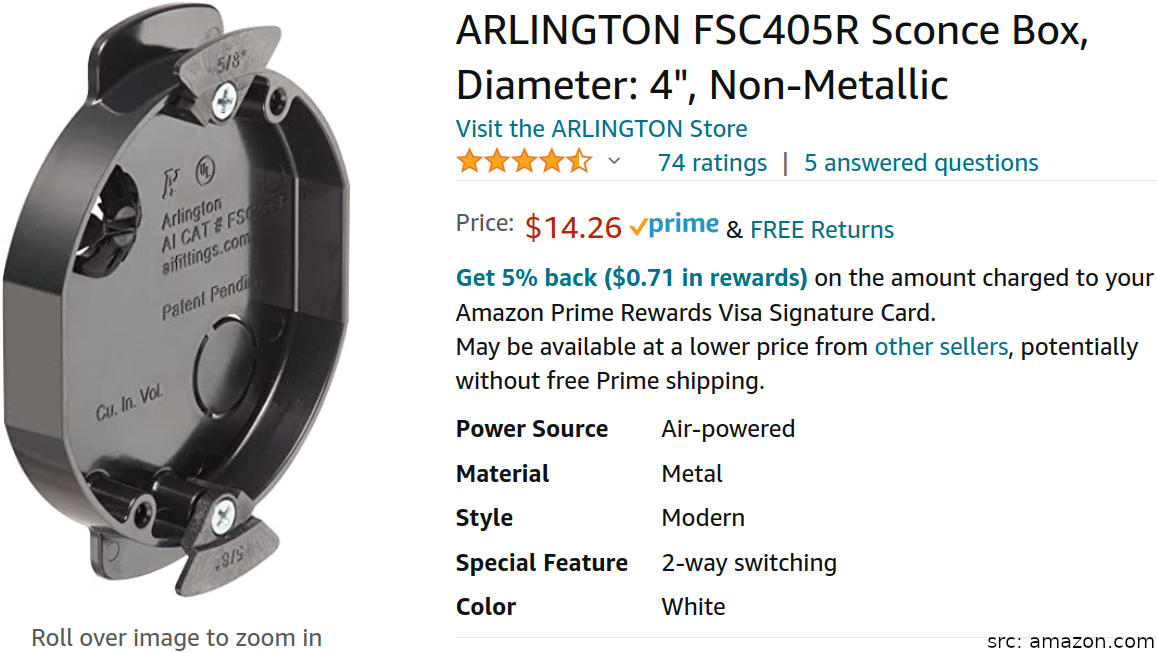
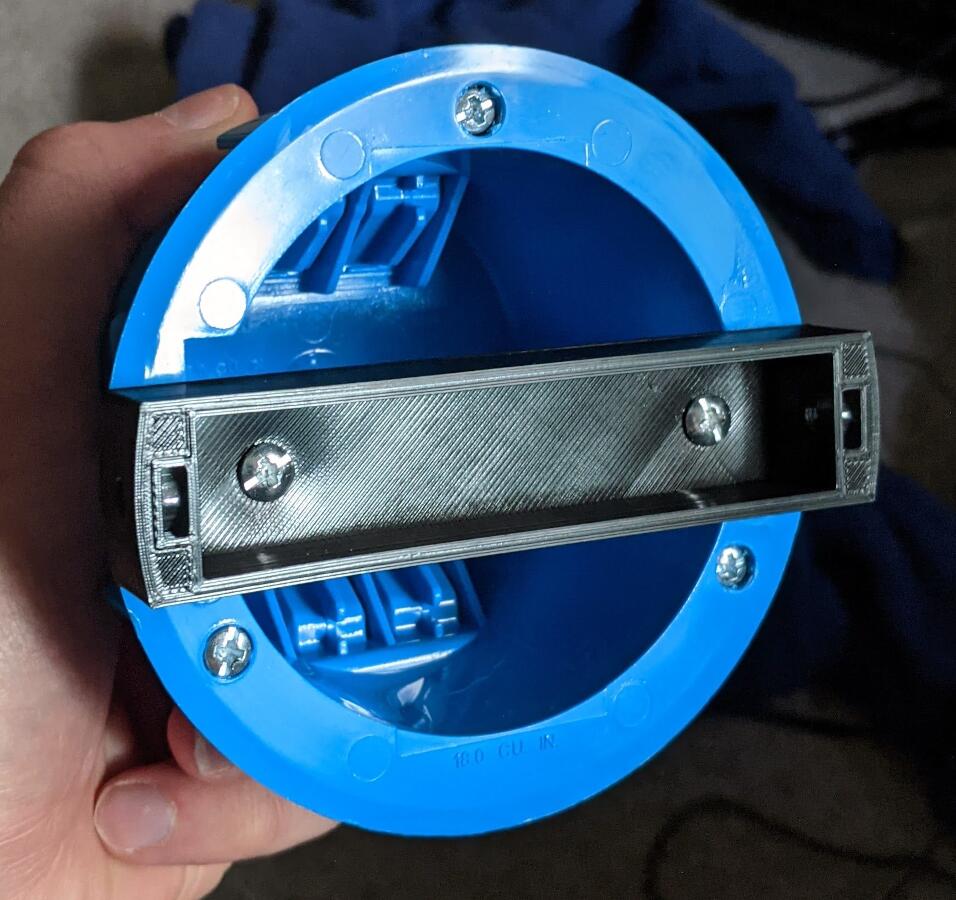
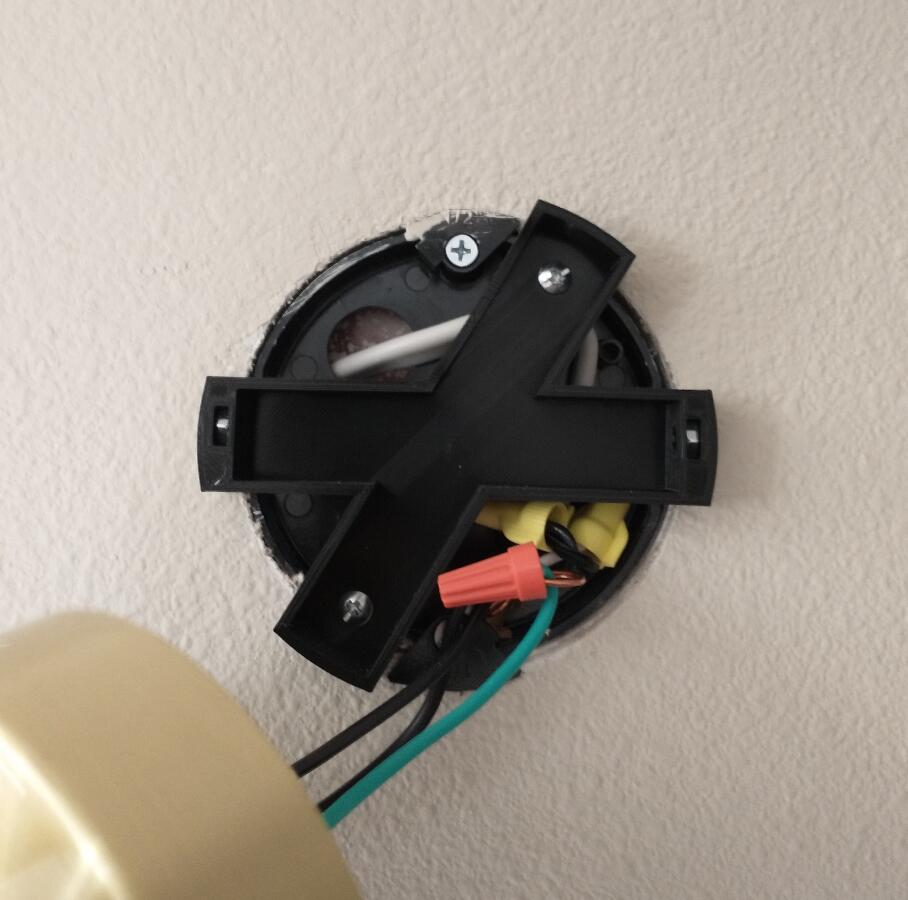
These are not very common, and ones that can be installed without removing the drywall are even less common. At $14, it was almost 7 times more than regular boxes, and it came with its own host of problems. First: the little wings on the front that clamp to the surface of the drywall have a slightly greater outer diameter, so they would have been exposed outside the lamp base and had to be cut down to fit. Second: little legs that go behind the wall are only on direct opposite sides, which means that it needs to be installed vertically, as it is shown in the photo, to get the maximum leverage against the drywall when it is holding up a lamp. The holes where the screws are supposed to go would then be at a 45-degree angle instead of horizontal, which means that it needed a different shape of adapter for our sconces.
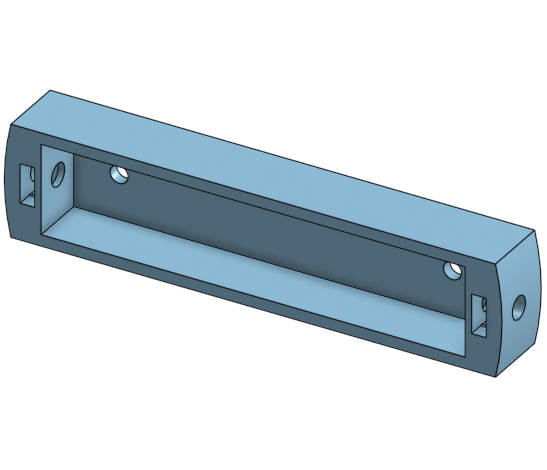
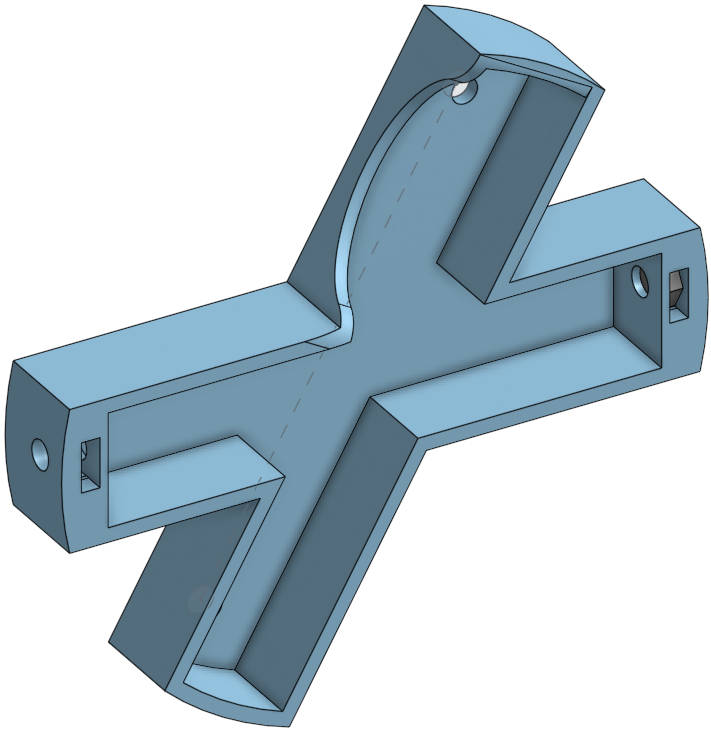
I ended up making 2 adapter bracket designs with nut inserts for this project. The nut insert slots have detents to keep the nuts from falling out. Because of the way the wires come out of the back of the sconce base, the design for the shallow sconce box ended up a bit more complicated.
The electrical circuit in this room had a switched wire already. We didn’t need the switched outlets any more, so I replaced the outlets. I ran 14AWG cable straight down to the outlet box on the exterior wall where I spliced it in. On the interior wall, I had to cut an opening in the drywall on the other side of the wall to run the cable over to an outlet box.
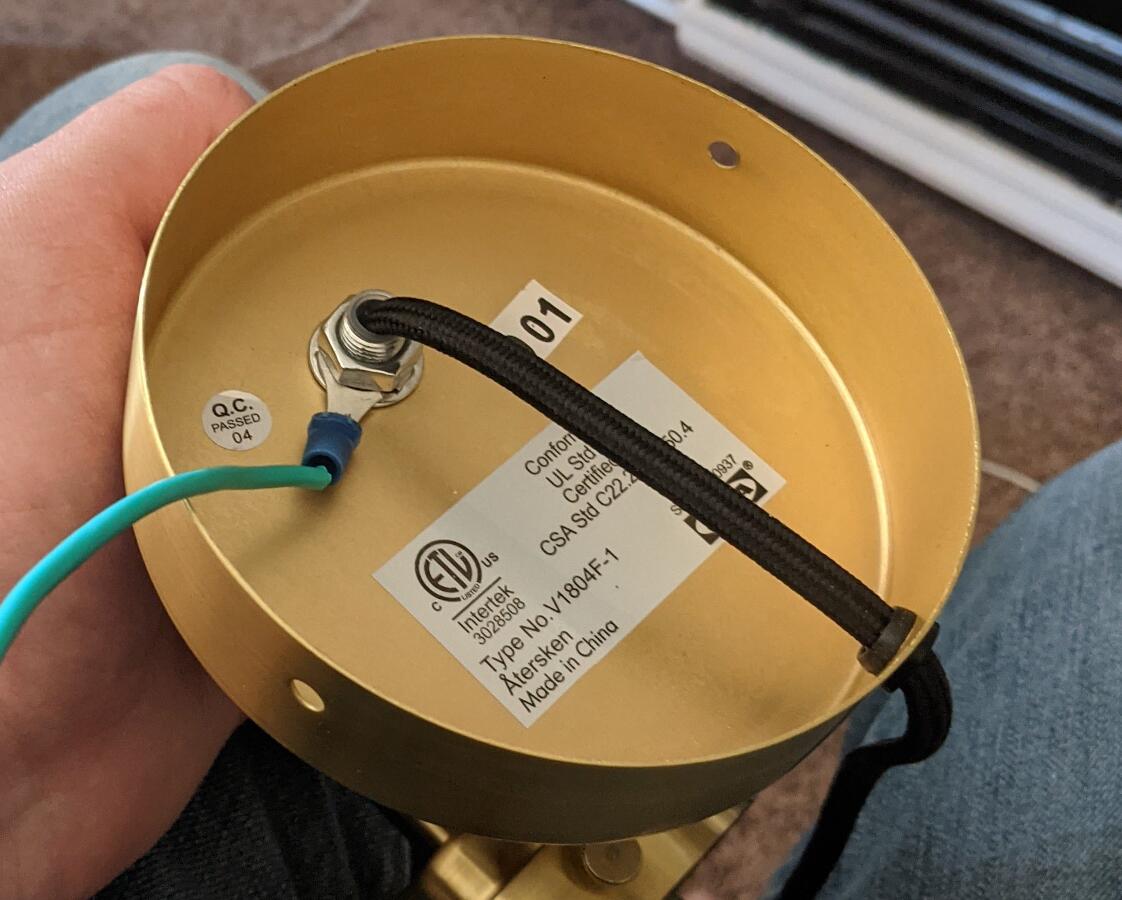
Before installing the sconces, I used a crimp terminal to add a ground to the enclosure. This is very important. Without this ground connection, if the hot wire in the box were to come loose and touch the metal box, the outside of the lamp would be hot, and someone could get hurt. With the ground connected, the shortest path to electrical ground will be through the wall, and, if the hot line is shorted to the case, a circuit-breaker will immediately trip and cut power.
Lastly, I cut back the lamp cord that came with the sconces, spliced it into the wall boxes, and bought a brass screw with matching color to cover up the hole where the old cord used to be.