In addition to work on our new house, I have also been working on our home before we can offer it as a rental. A big part of that was bringing the 2 guest showers up to snuff so that we don’t need to worry about a tenant causing or having to deal with water damage. We hired a company to do the basement shower, which went pretty well. After cleaning up their mistakes, though, I decided to re-tile the other bathroom myself and hire a refinishing company to refinish the bathtub. I finished this project about a month ago, but I’ve been too busy at the other house to write it up until now.
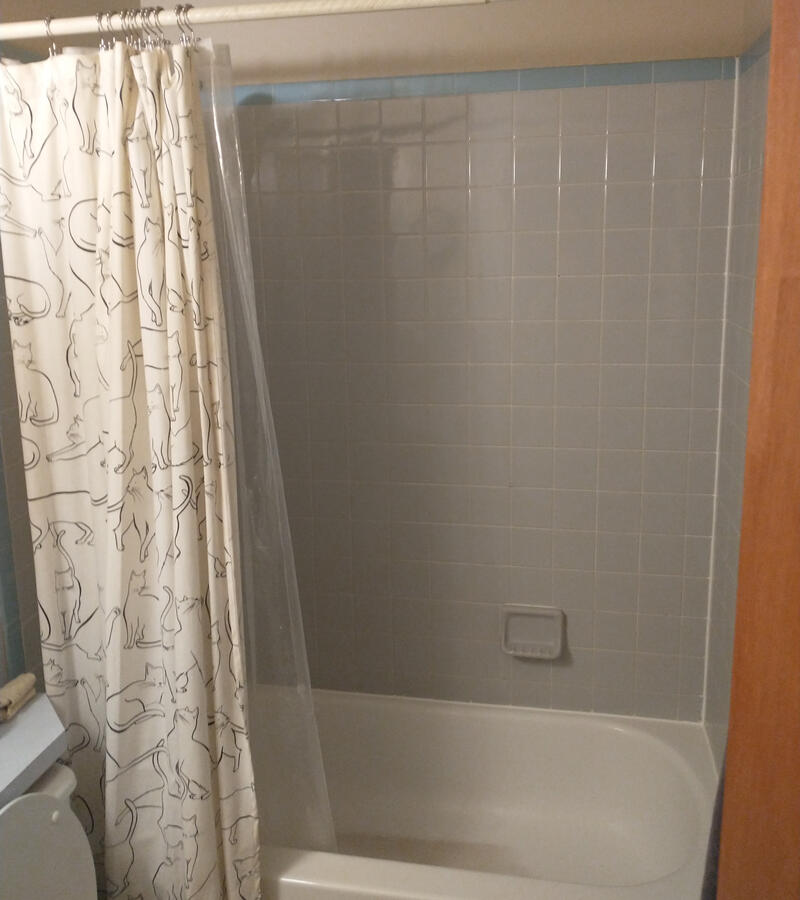
I demolished the existing tub surround extremely carefully, because our very nice shower is right on the other side of the wall. It looked like the wall behind the tile was drywall, so I expected to find some gross stuff behind it. It wasn’t nearly as I was expecting, though, and I was able to clean it up pretty easily.
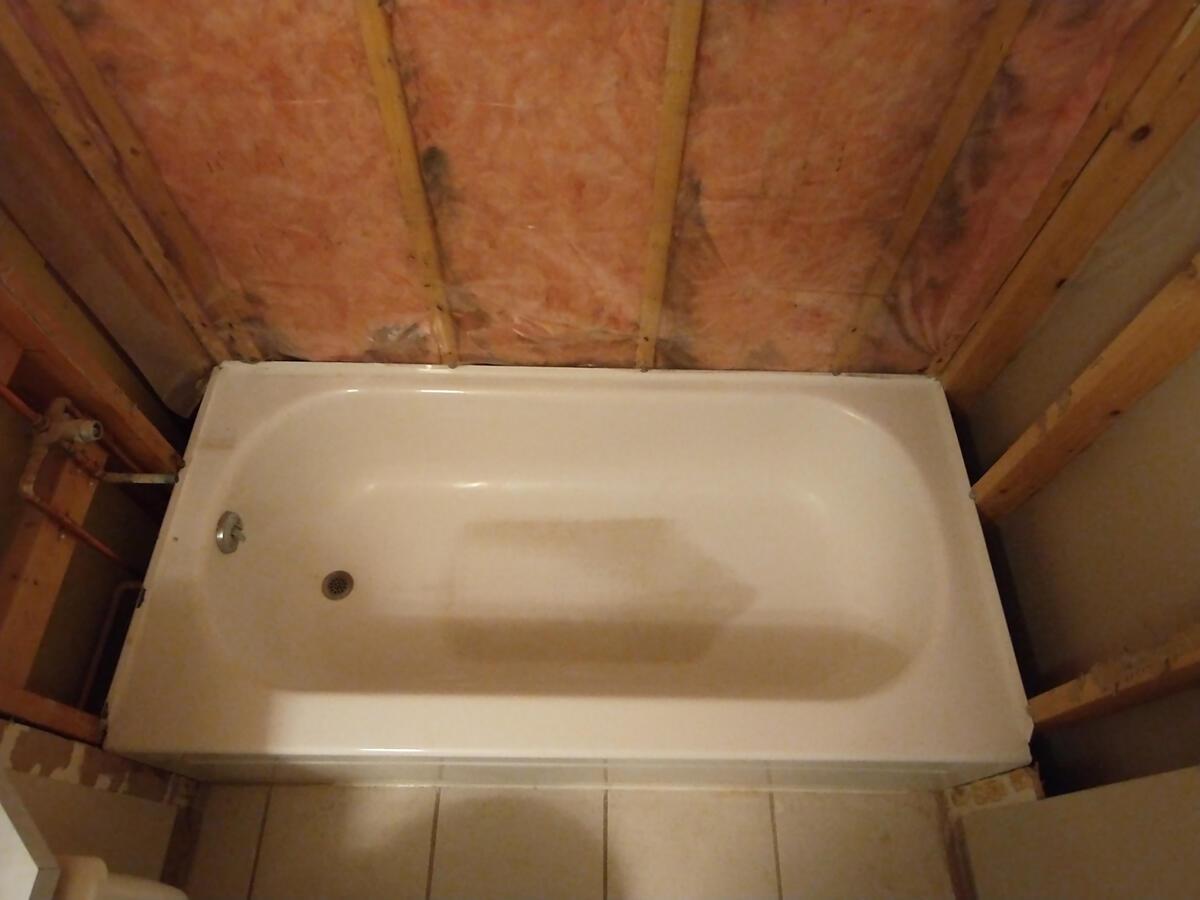
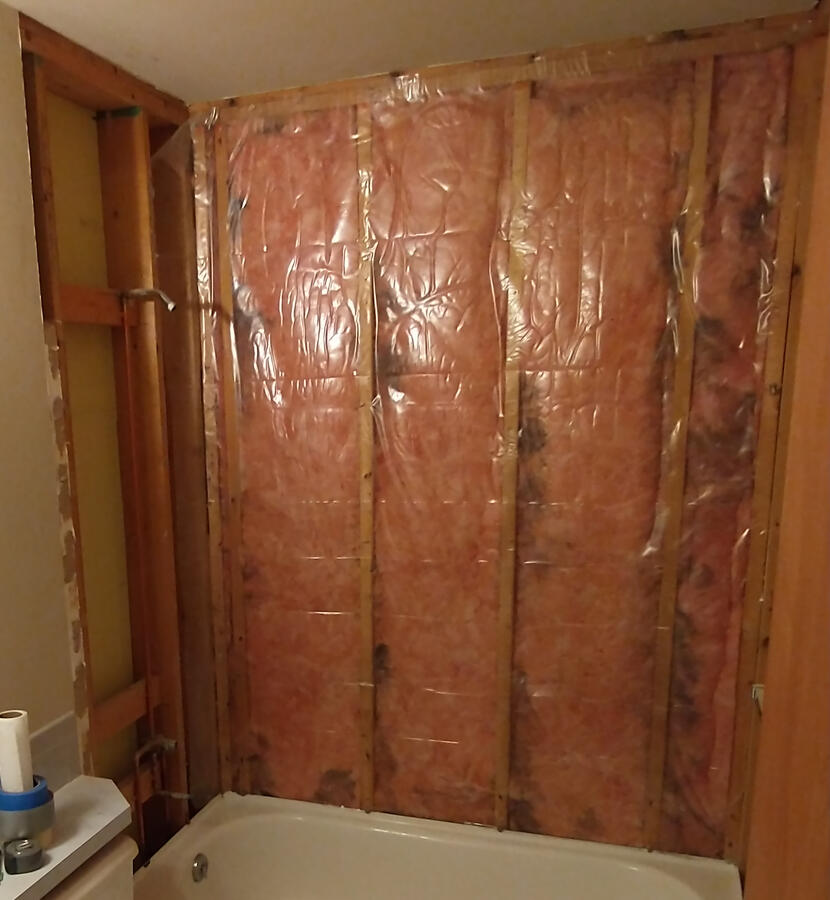
Unfortunately, this tub sticks slightly out over the edge of a stud, so I added a sister beam to those studs to keep support on the drywall and cement board edges while allowing the cement board to extend up to the real outer edge of the tub. Extra unfortunately, when I was cutting that extra bit of drywall away, I hit tile on the back of the drywall. Our shower on the other side of this wall was a huge pain, and the first contractors we hired actually tried to build the nook in the shower by tiling on the back of the drywall in the opposite room. Our next contractor, understandably, left that tile in the wall. I found it again, and had to cut a much larger chunk out of the wall than I intended.
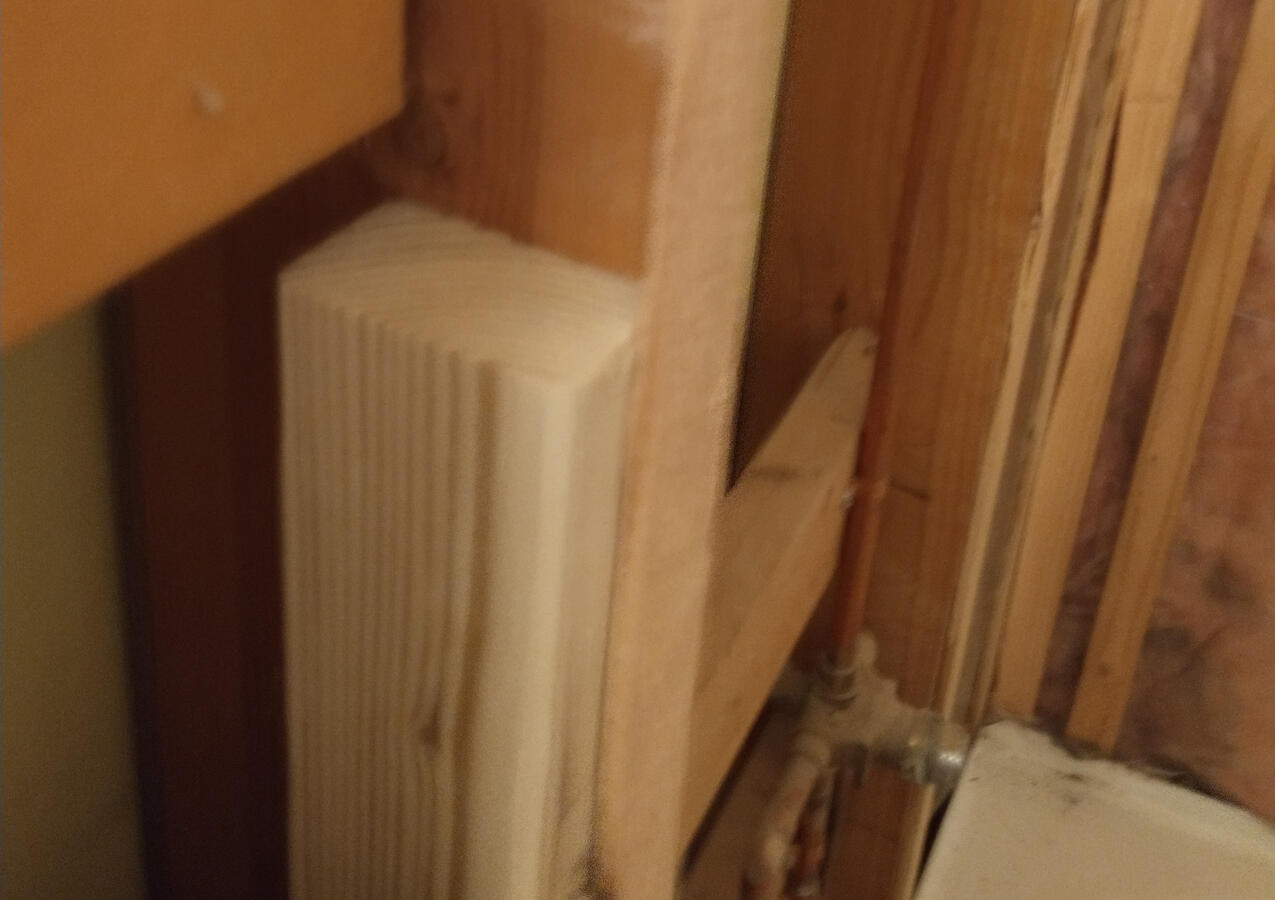
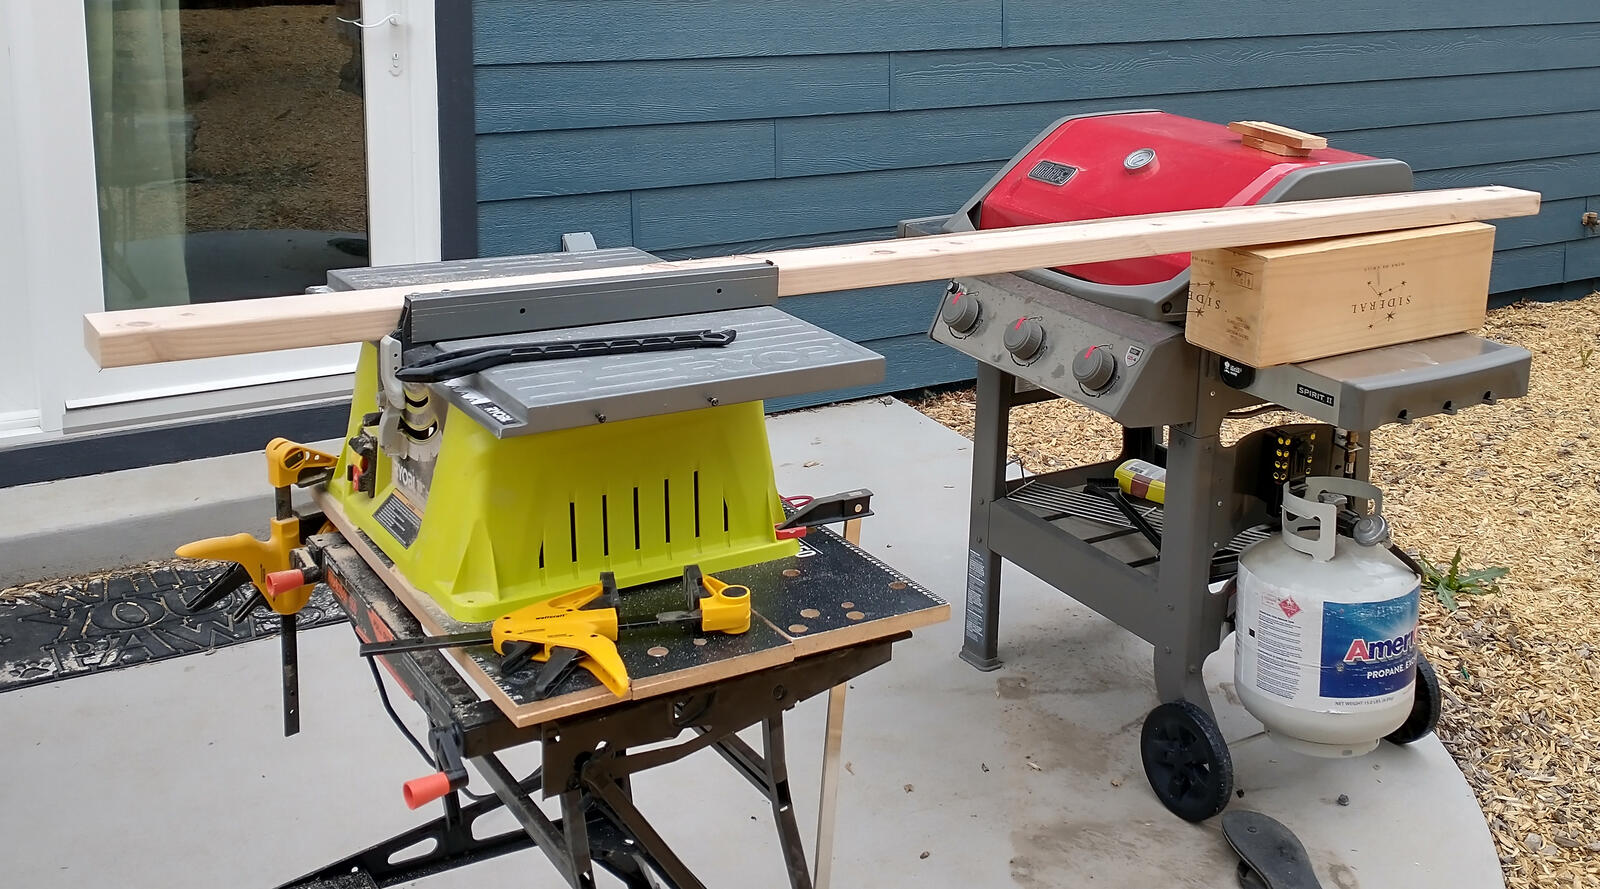
Sistering the studs to support new drywall turned out to be a real pain because the 2×4 studs that were used to build one of the walls in the 80s were not 1-1/2 x 3-1/2 inches, but closer to 1-5/16 x 3-5/16 inches. I was not able to buy any matching lumber, so I had to borrow my friend’s table saw to rip a new 2×4 down to size.
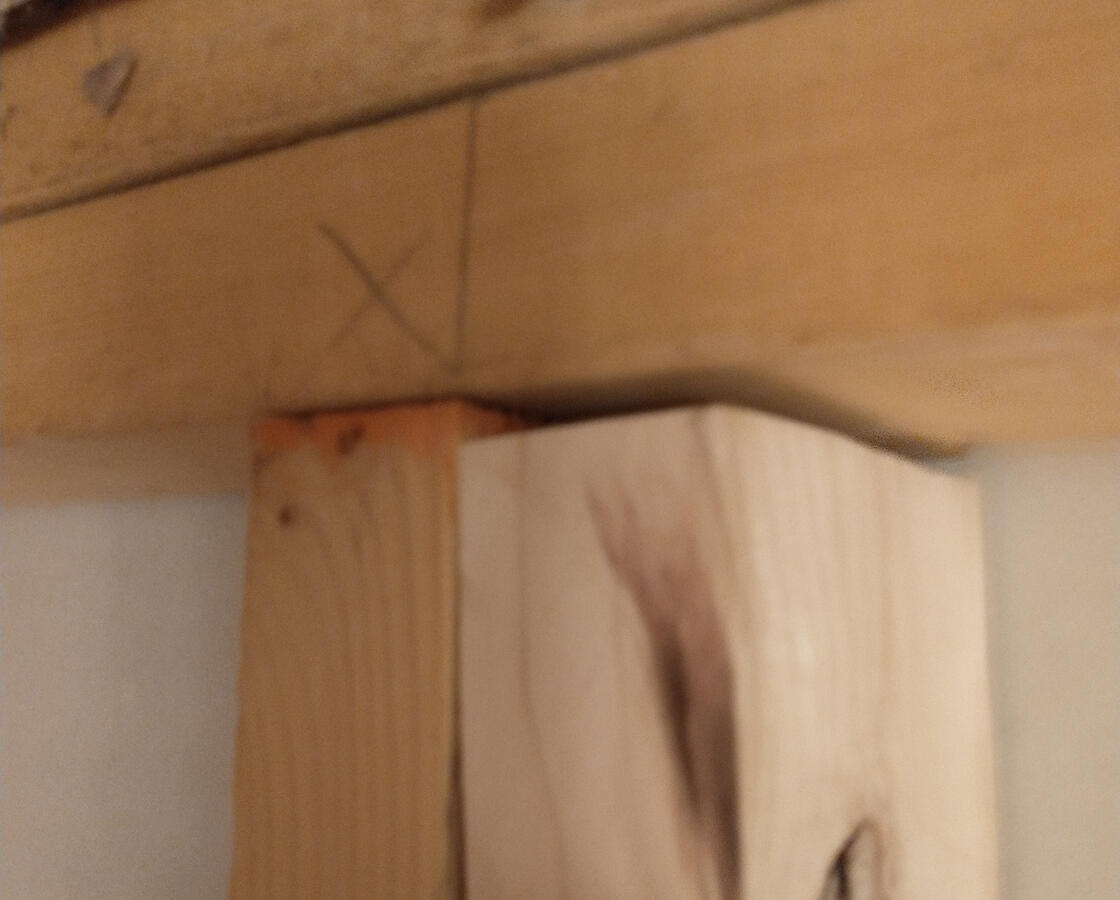
At this point, I also had to deal with the tub flange spacing. The tub was installed against the surface of the studs, and the previous installer just tightened the drywall down onto the tub flange, cracking it. That wasn’t going to cut it, so I used furring strips to thicken each of the studs by 1/4″ so that the backer board would clear the flange and screws.

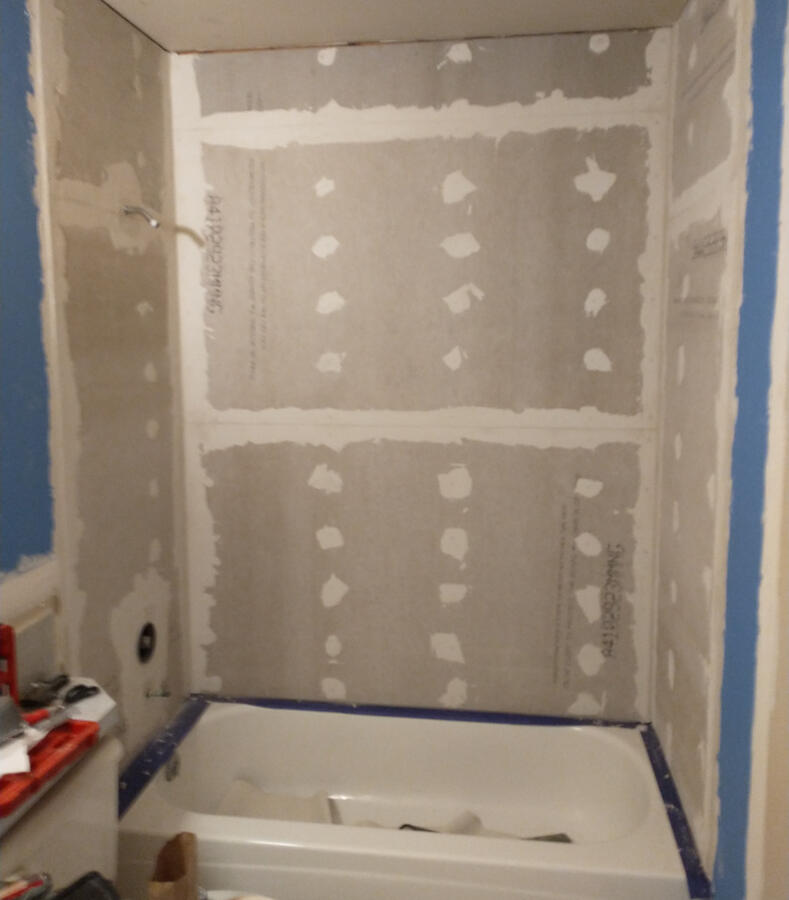
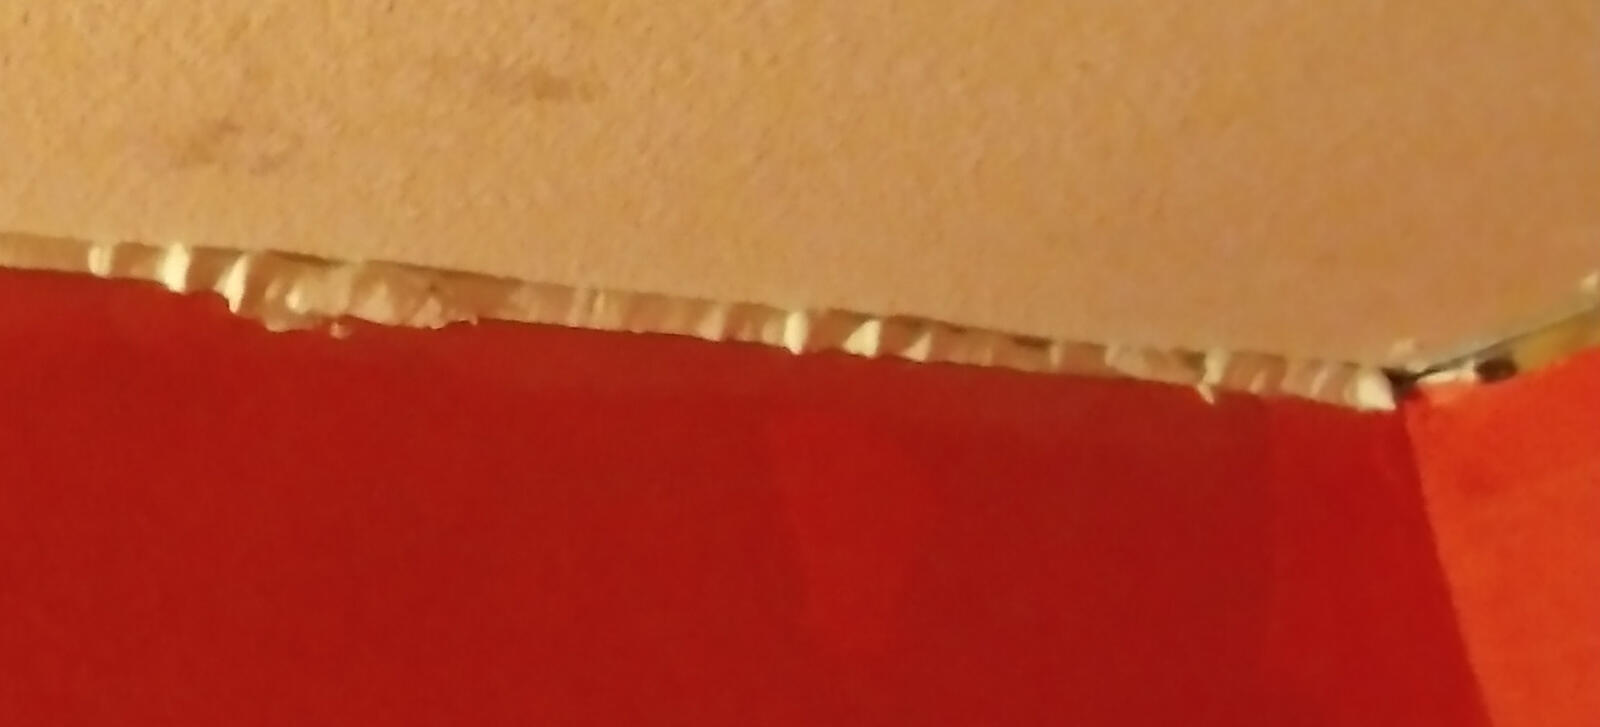
With the walls all nice and planar, I cut and fit the backer board. and new surrounding drywall. With the walls being 1/4 of an inch thicker than before and the backer board being slightly thinner than drywall, the backer board sticks out about 1/8 of an inch above the surrounding drywall. In most of the places I was able to hide that gap by aligning the backer board with the edging so that a thick bead of silicone would cover its edge, but only after I had made a rather ugly mistake that would have to be covered with a lot of silicone and some paint.
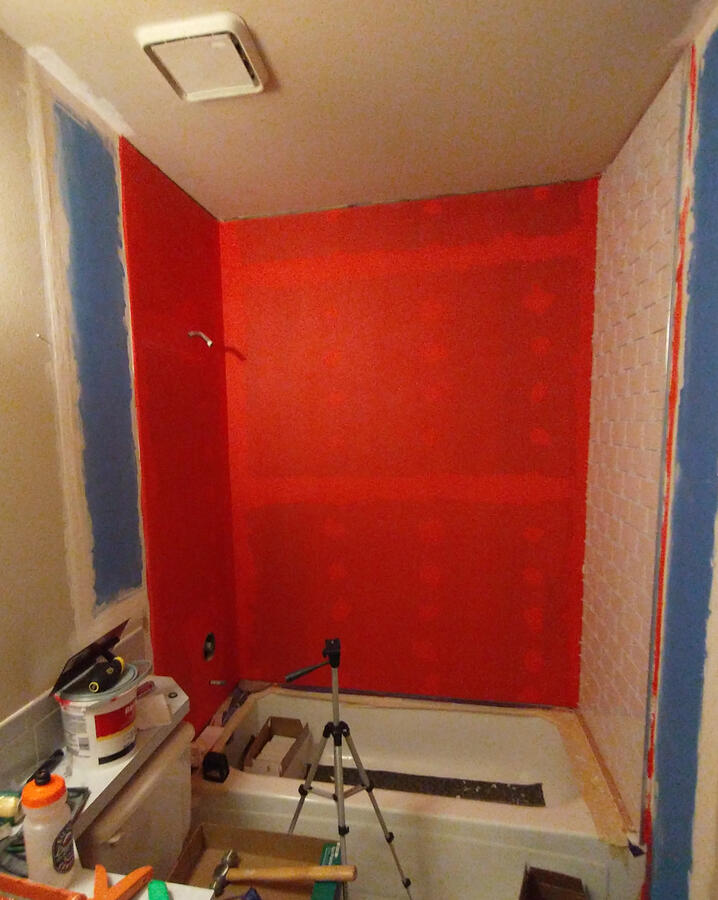
I used a waterproofing system made from HardieBacker cement board and Redgard waterproof membrane. As a renter, I would re-silicone shower fittings that had been knocked loose, but I think I was probably in the minority there. With that in mind, I also used waterproofing gaskets that provide additional protection against water trickling into the wall along pipes and behind fittings. If I was doing this again, I would probably splurge and use the Kerdi waterproofing system instead, since the foam panels are lightweight and I could have used a knife to carve a channel to clear the tub flange instead of spacing the backer board off the wall.
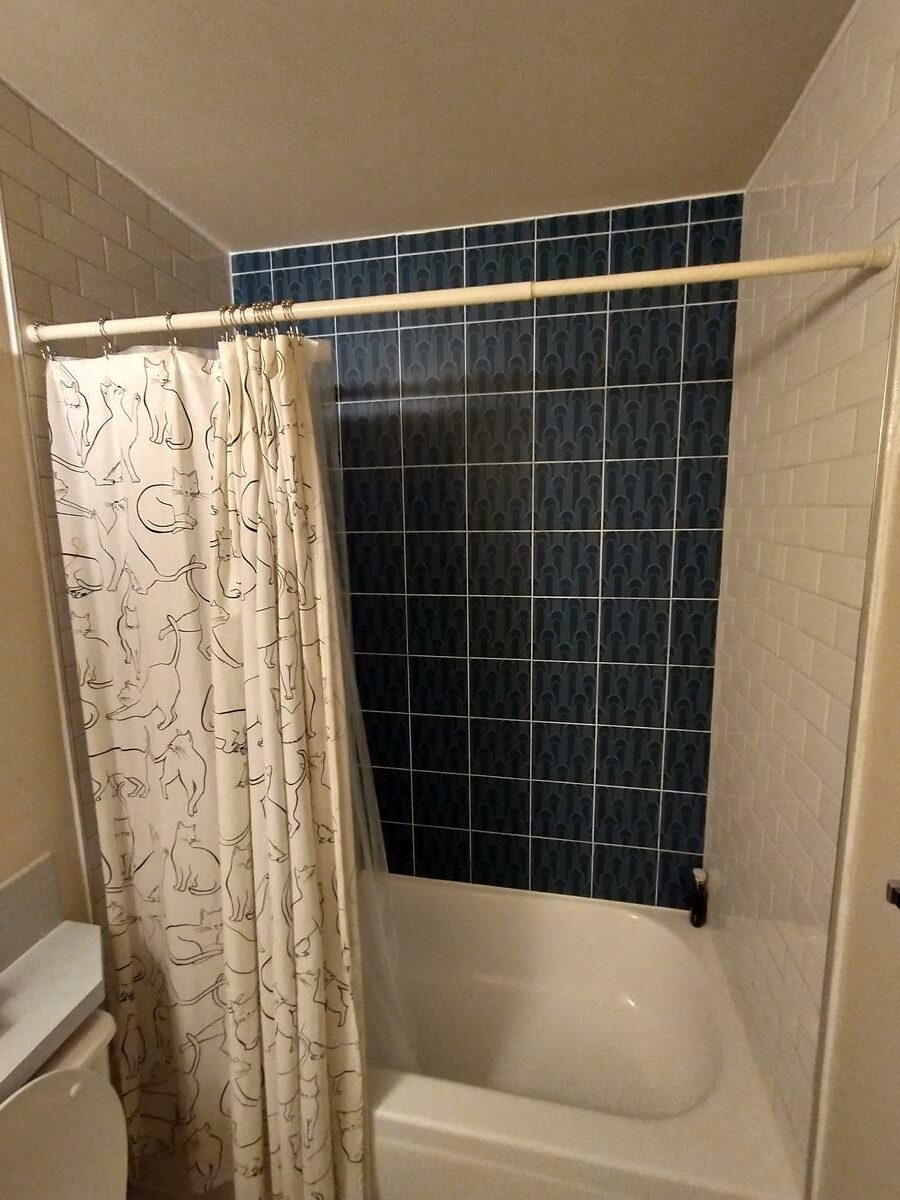
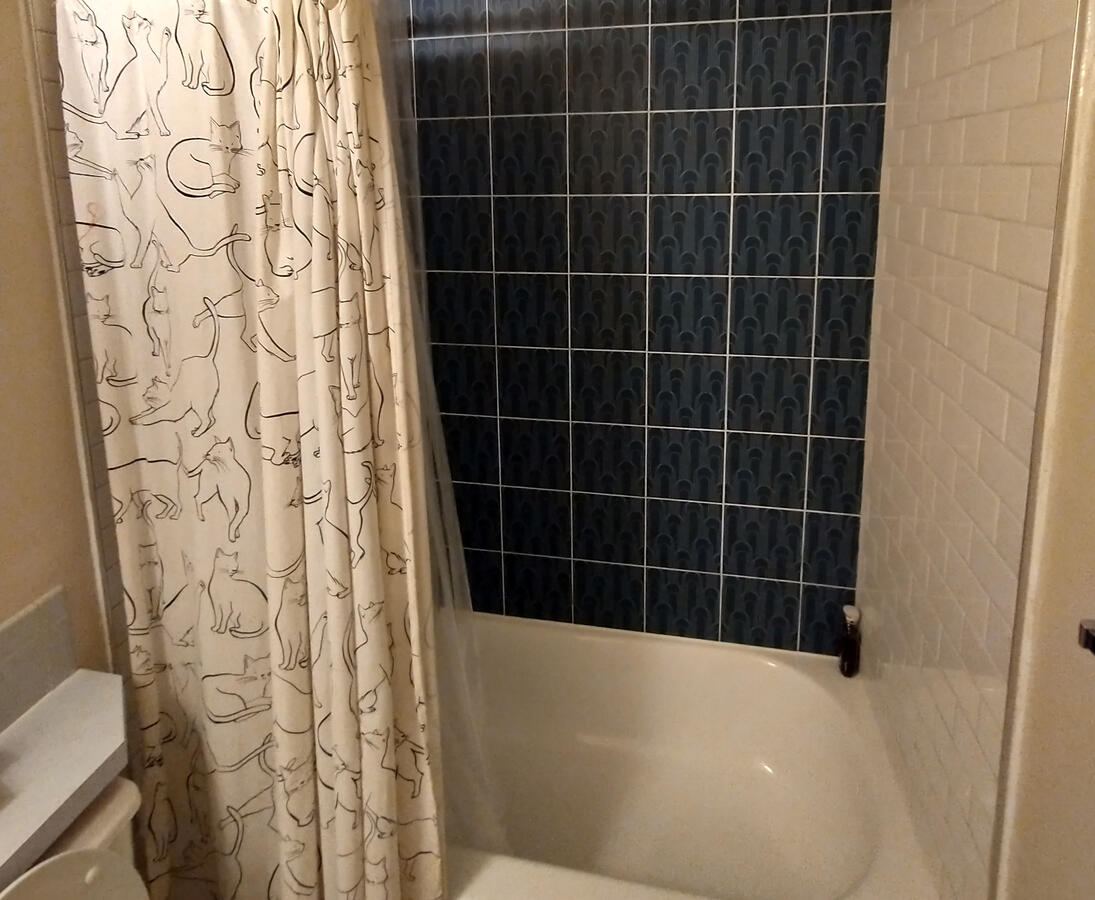
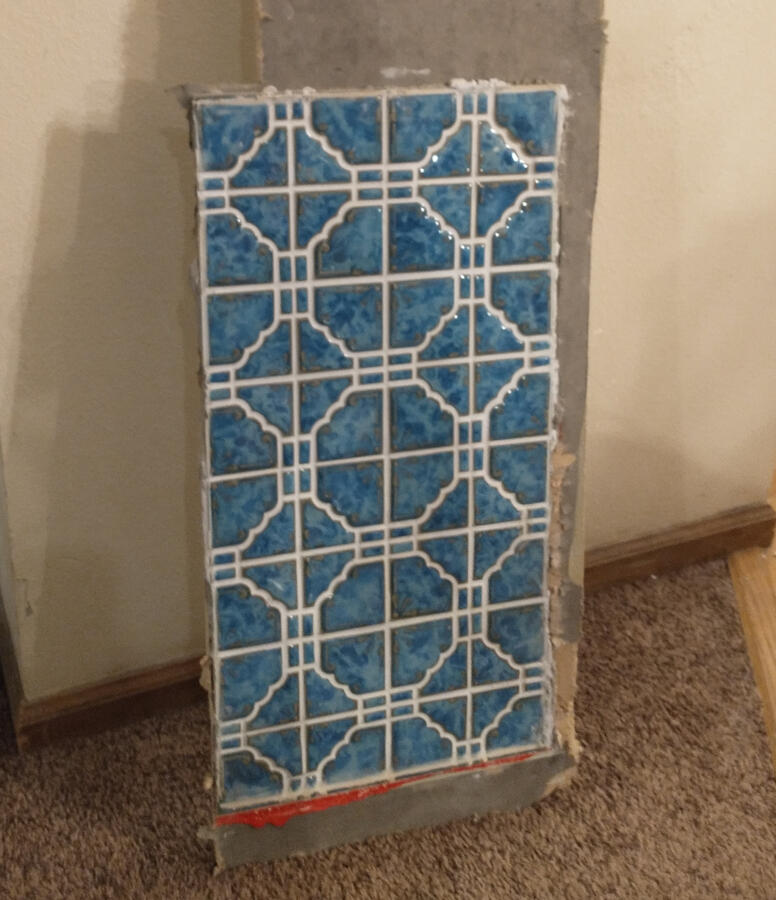
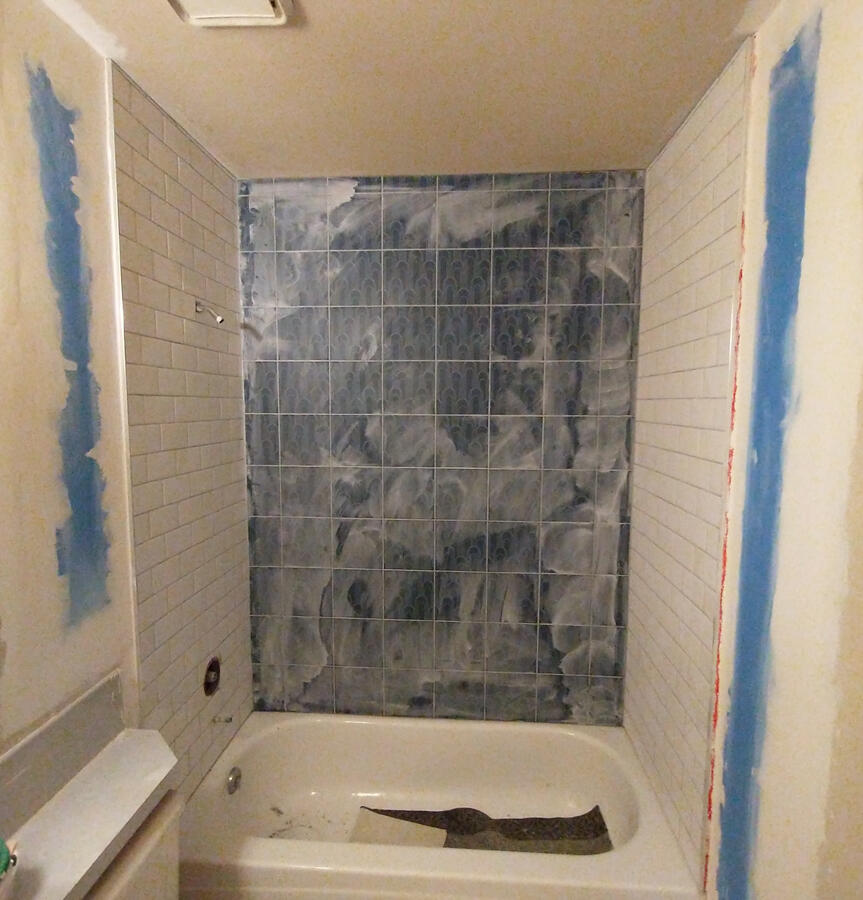
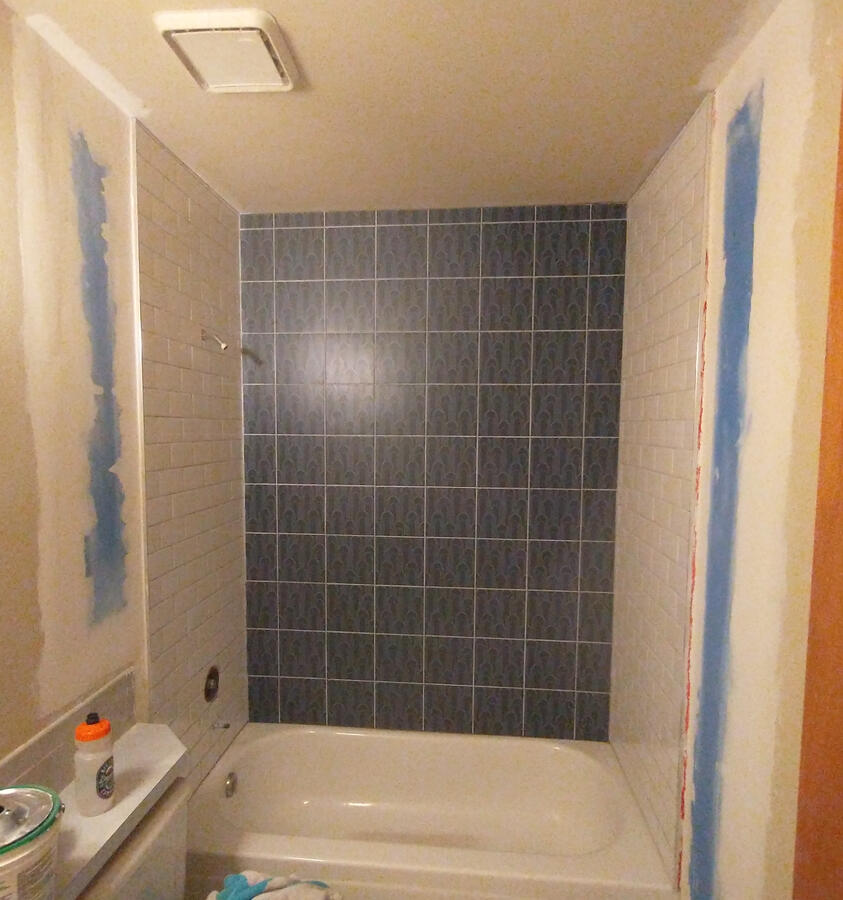
Once all that was done, I got to tiling 2 walls of subway tiles and one wall of square tiles. According to some versions of the instructions of the backerboard, but against the instructions of the bathtub refinishing company, I left a 1/4 inch gap between the tub surface and tiles. The silicone that I used can be used to bridge areas up to 1/4 inch, but I resigned to do it myself after the refinishing.
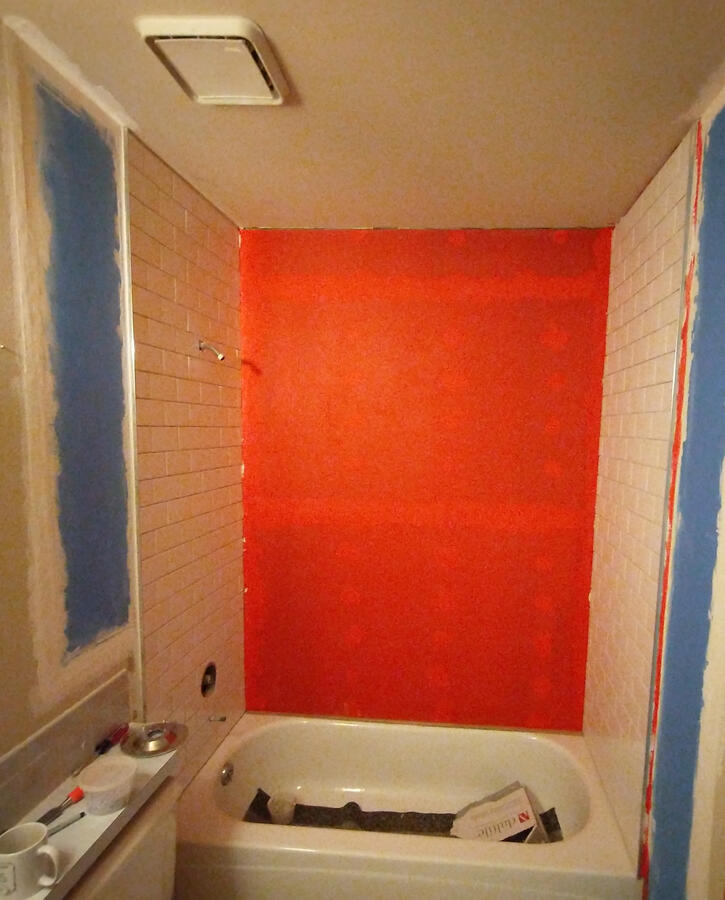
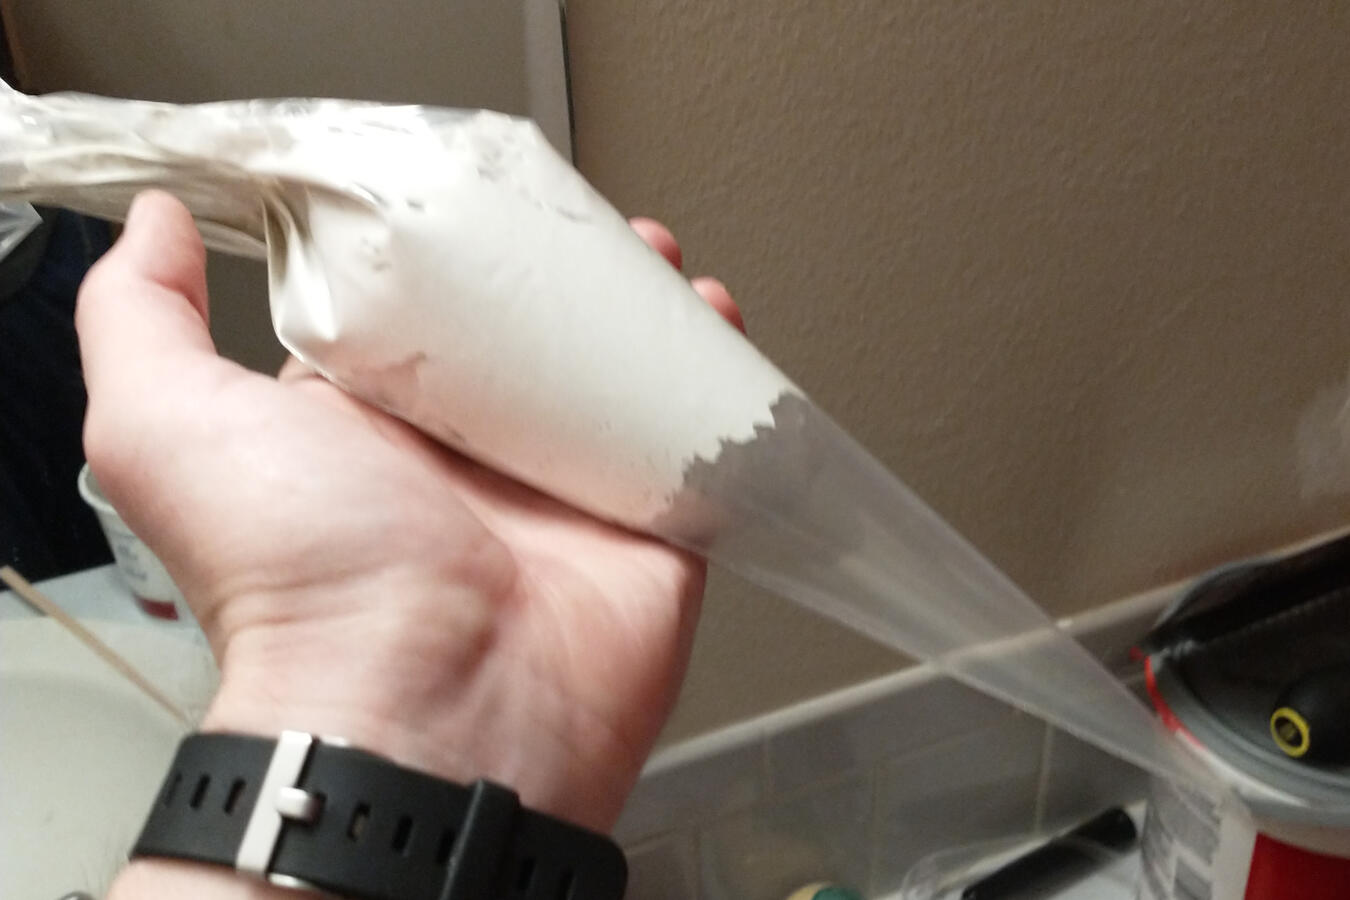
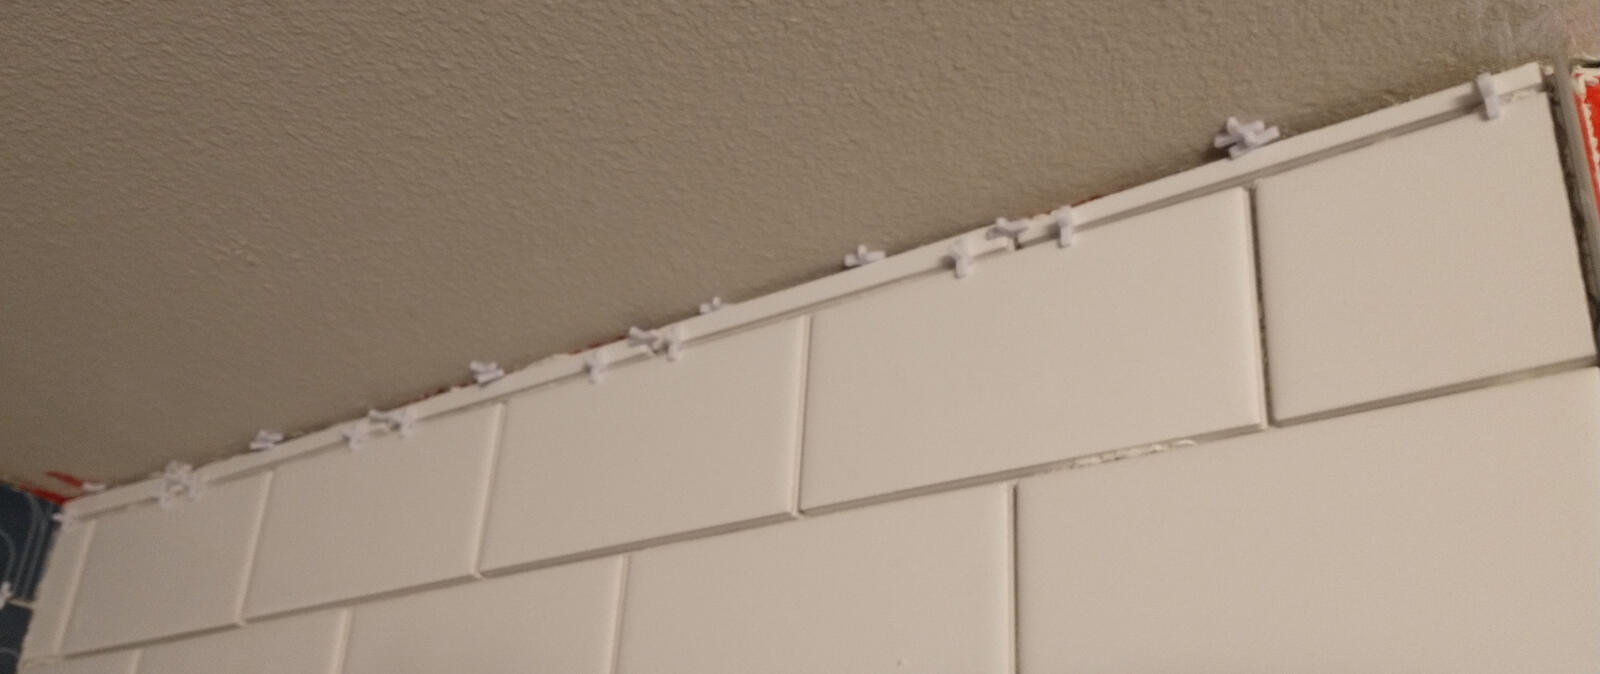
Another mistake I made was to not plan in advance the clearance of the subway tiles with the ceiling. I started with whole tiles on the bottom row because I knew the tub was level. When I got to the top, I realized the last row was going to have to be so thin I couldn’t do it with a score-n-snap tile cutter. To do the last row, I ordered a tile saw for around $75. The cuts I got out of it were so good I decided to use it for all of the cuts on the third wall, where the square tiles were thicker. In order to support the thin tile row during installation, I used a piping bag to pipe thinset into the gap between the backer board and ceiling, then leveled the ceiling and scraped off the excess.
Finally, I grouted, caulked, and grout-sealed the whole thing. The refinishing company came to the house and turned the bathroom into a paint booth for 2 days so that we now have a new-looking bathtub. I’m pretty happy with how this project turned out, and I am even more happy that I know all of the work that went into it was done correctly to make a robust shower that will be waterproof for a long time.
To finish off, I textured and painted the new drywall areas. As usual, I found it really hard to work with drywall, but eventually I realized that the bucket of drywall mud I was using was expired, and a new bucket of mud mostly fixed my issues.