
A couple weeks ago I received an email from someone hoping to purchase some printed Ikea Tertial pegboard holders from me. This is the second time someone has reached out, and while the design has been popular I have had some qualms about the design not being very good. The main issue was that printing the pegboard interface in the original orientation caused the pegs to be extremely weak. This was especially apparent to me when my printer broke and was operating in a weakened state for a while, and when printing with old, brittle plastic. I created a version 2 of this design and was able to fix the issue by adding a feature to my design-for-FDM toolbox: dovetail joints.
When you print parts with an FDM printer, the strands of plastic coming out of the nozzle are pretty strong, but their bonding to each other is pretty weak, especially between layers of the print. When you lay down new plastic, it is just slightly hotter than its melting point, and it heats the surface of the previous layer to beyond is melting point to fuse the layers together. However, the bead of plastic applied by the nozzle is round, and the amount of plastic that actually gets fused together is pretty small. Practically, that means that parts have the weakest tensile yield strength normal to their print layer orientation and the weakest shear strength parallel to it. At one extreme, it’s useful to think about it as a stack of things that can each move on its own. You can improve layer adhesion a bunch of ways, but the necessity of layers means that FDM parts will always have one dimension that is weak to tensile stress. I tried a lot of printing techniques to improve the adhesion, but nothing worked. The real trick is designing parts so that that weakness doesn’t matter.
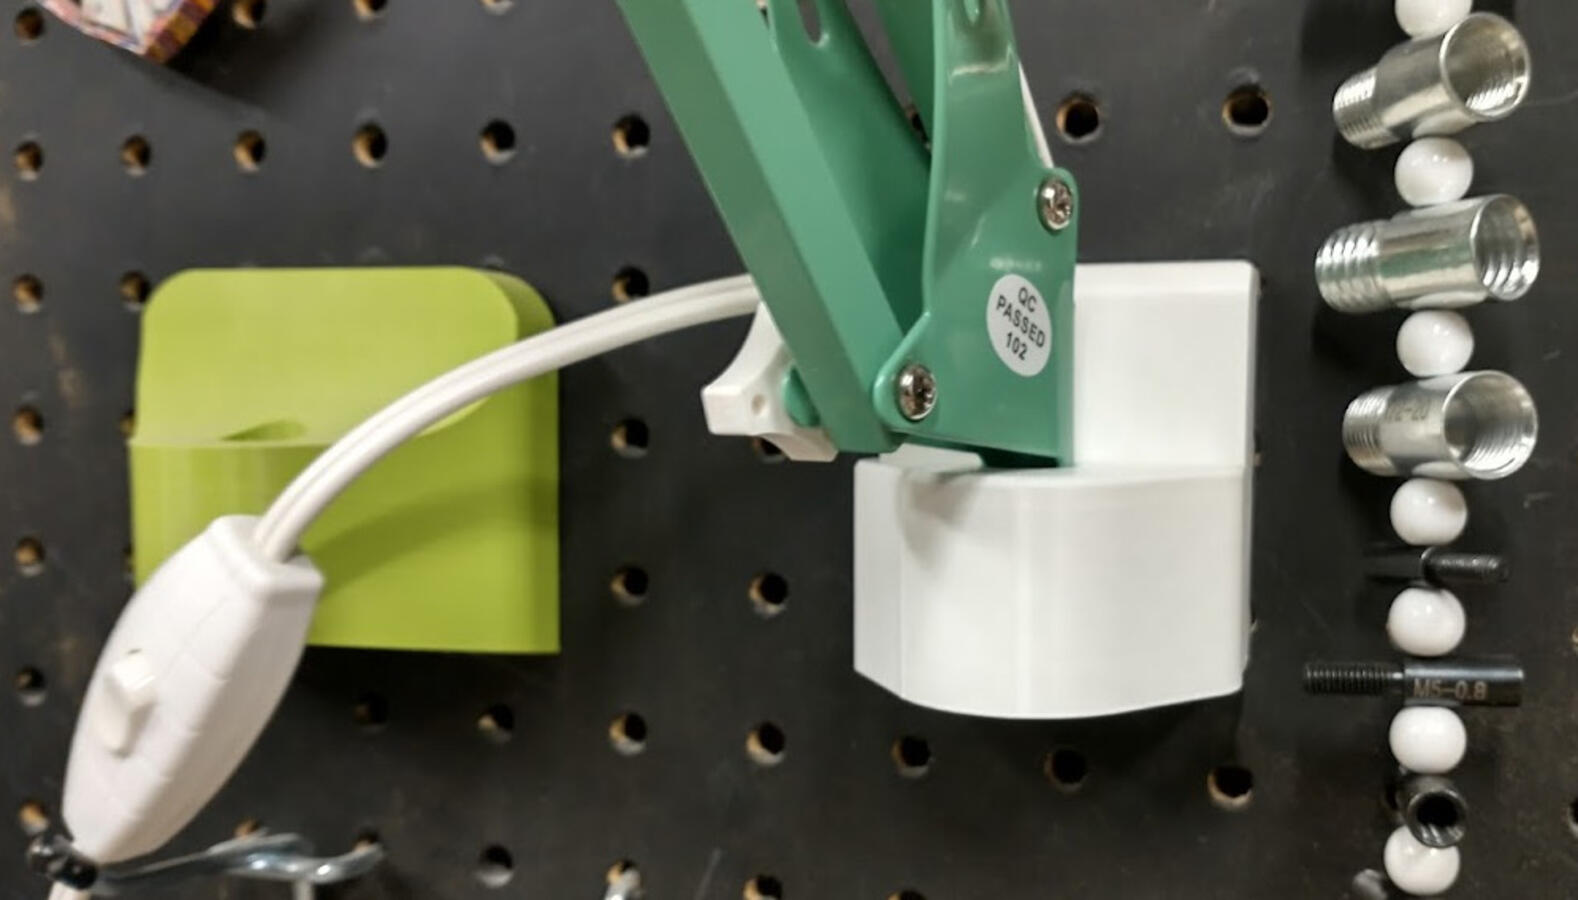
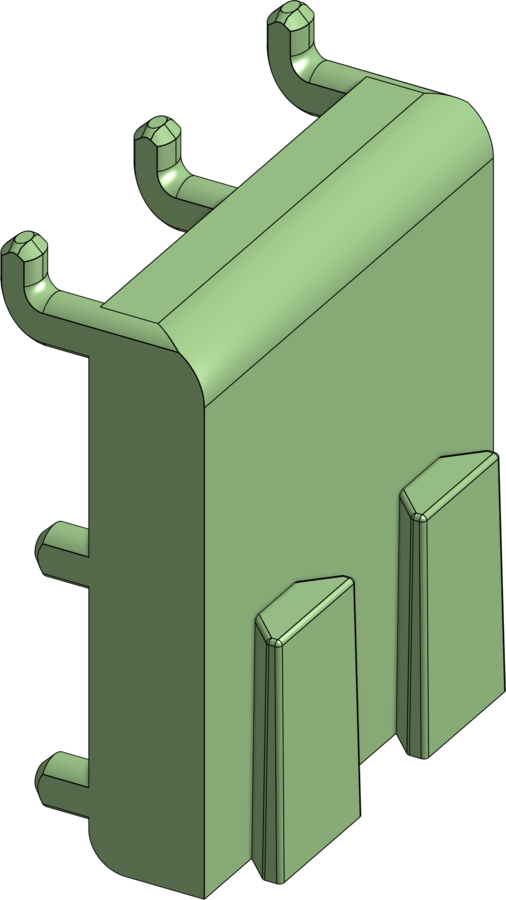
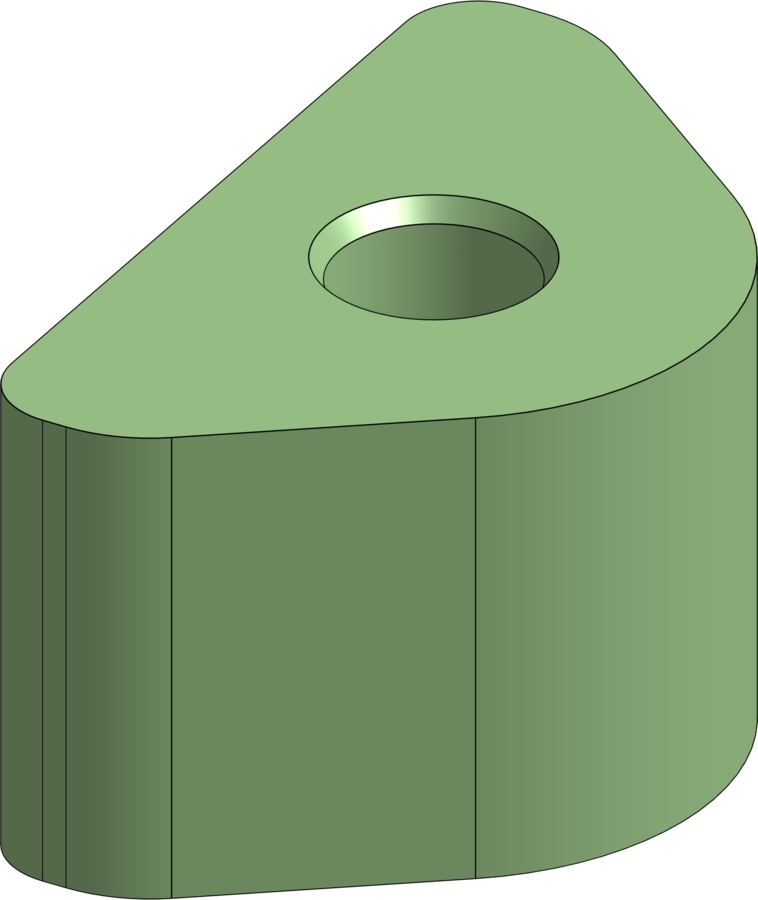
This part has 4 important dimensions for external interfaces. The pegs need to hold gravitational force, the hooks on the top need to provide retaining force normal to the wall, and the lamp hole needs to hold the lamp in both horizontal directions. Any tensile force applied to the pegs from the left or right is minimal, and the lamp does not apply ant tensile force in the up/down direction. Ideally, then:
- the pegs should be printed sideways so that the up/down and front/back forces are aligned with the print layers
- the lamp hole should be printed right-side-up so that the forces retaining the lamp are aligned with the layers
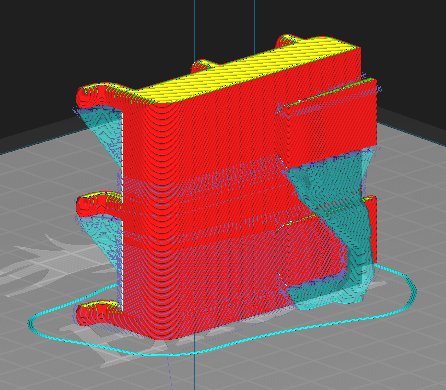
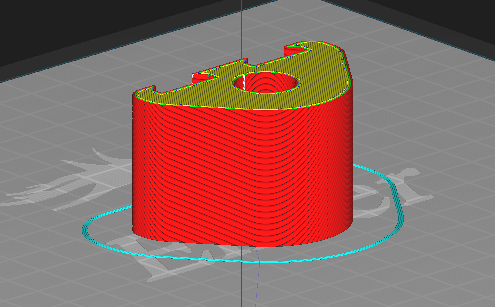
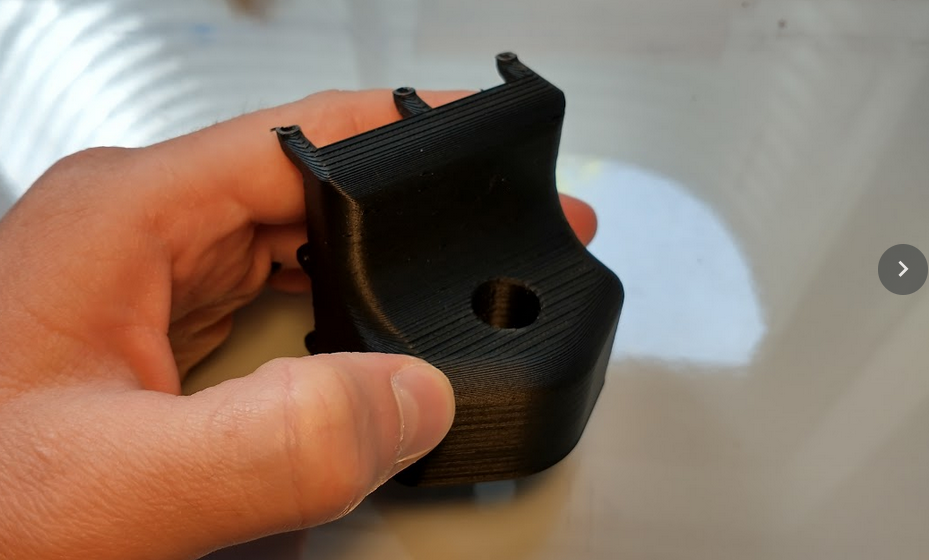
These 2 ideals are in opposition, obviously, so I decided to split the part into 2 pieces that can be easily assembled by hand. That way, each part is printed in a more ideal orientation. The joint between those two parts does apply a tensile force that could cause shearing, but because of the angle the force is applied at, it also applies a compressing force that helps counteract it.
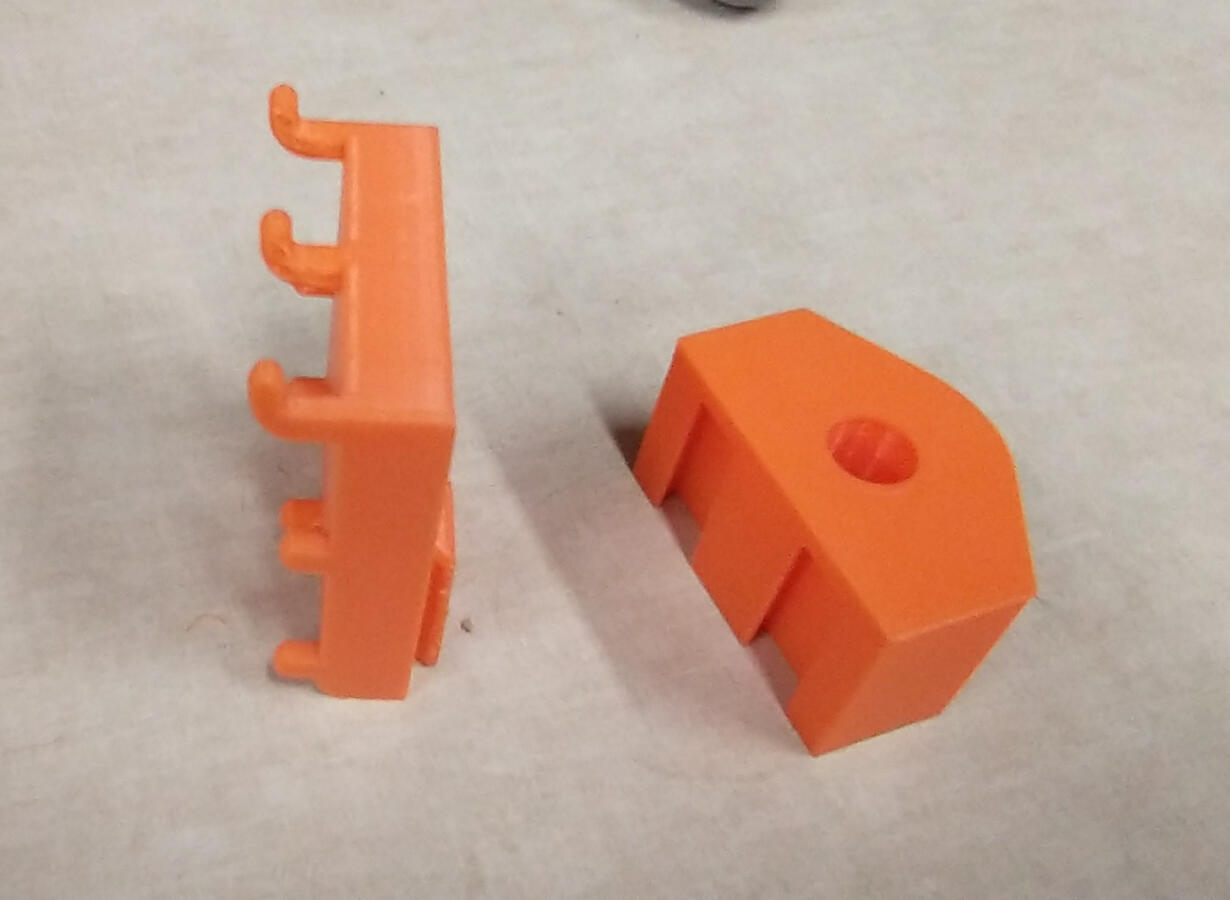
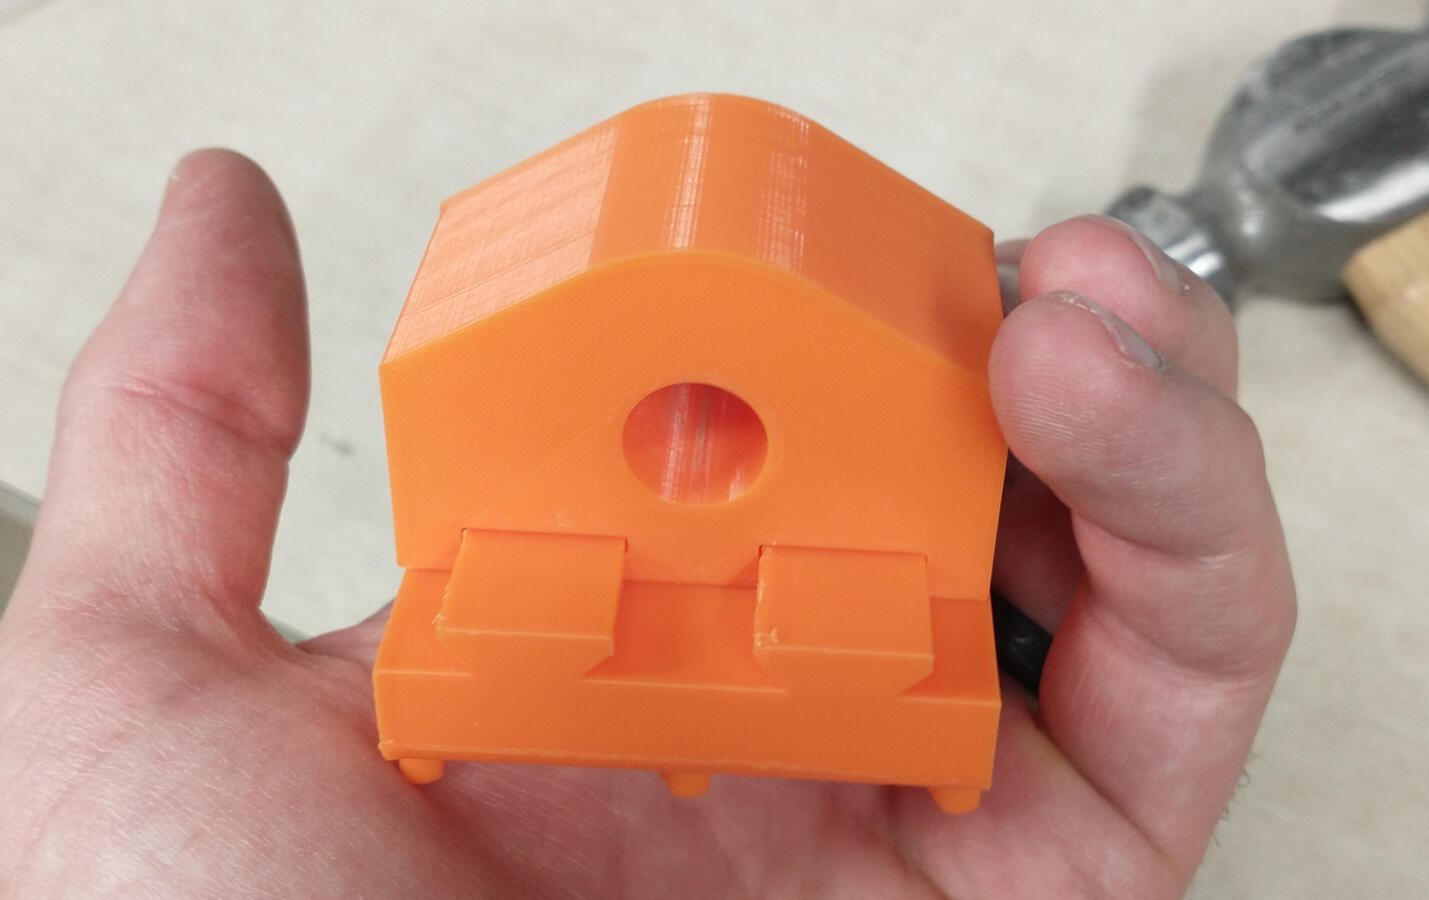
There is always some misalignment due to the first couple layers being squished, so I rounded the back edges of the front piece to hide that common imperfection.
This new design is way stronger than the previous one, so much so that I think that even printed out of PLA my pegboard will break before the part does. You can find the updated STL files over on Thingiverse.

One benefit of the split design that I have not explored is that the front can be printed with a different hole size and then swapped out in case you buy a different lamp. If you want to fork my design and change the hole size parameters, you can check out the project on Onshape.